Player Availability
Track player intent before check-in with the Player Availability feature
The Player Availability feature allows you to track player intent before the official check-in window opens.
Overview
This feature enables:
- Players to indicate whether they’re available or unavailable for a tournament
- Organizers to set availability on behalf of players
- Admins to view availability status summaries and history
Enabling the Feature
Player Availability is enabled at the organization level. To enable it:
- Navigate to your club’s settings page (Club → select your club)
- Find the Configuration section
- Toggle “Player availability tracking” to ON
- Click Save
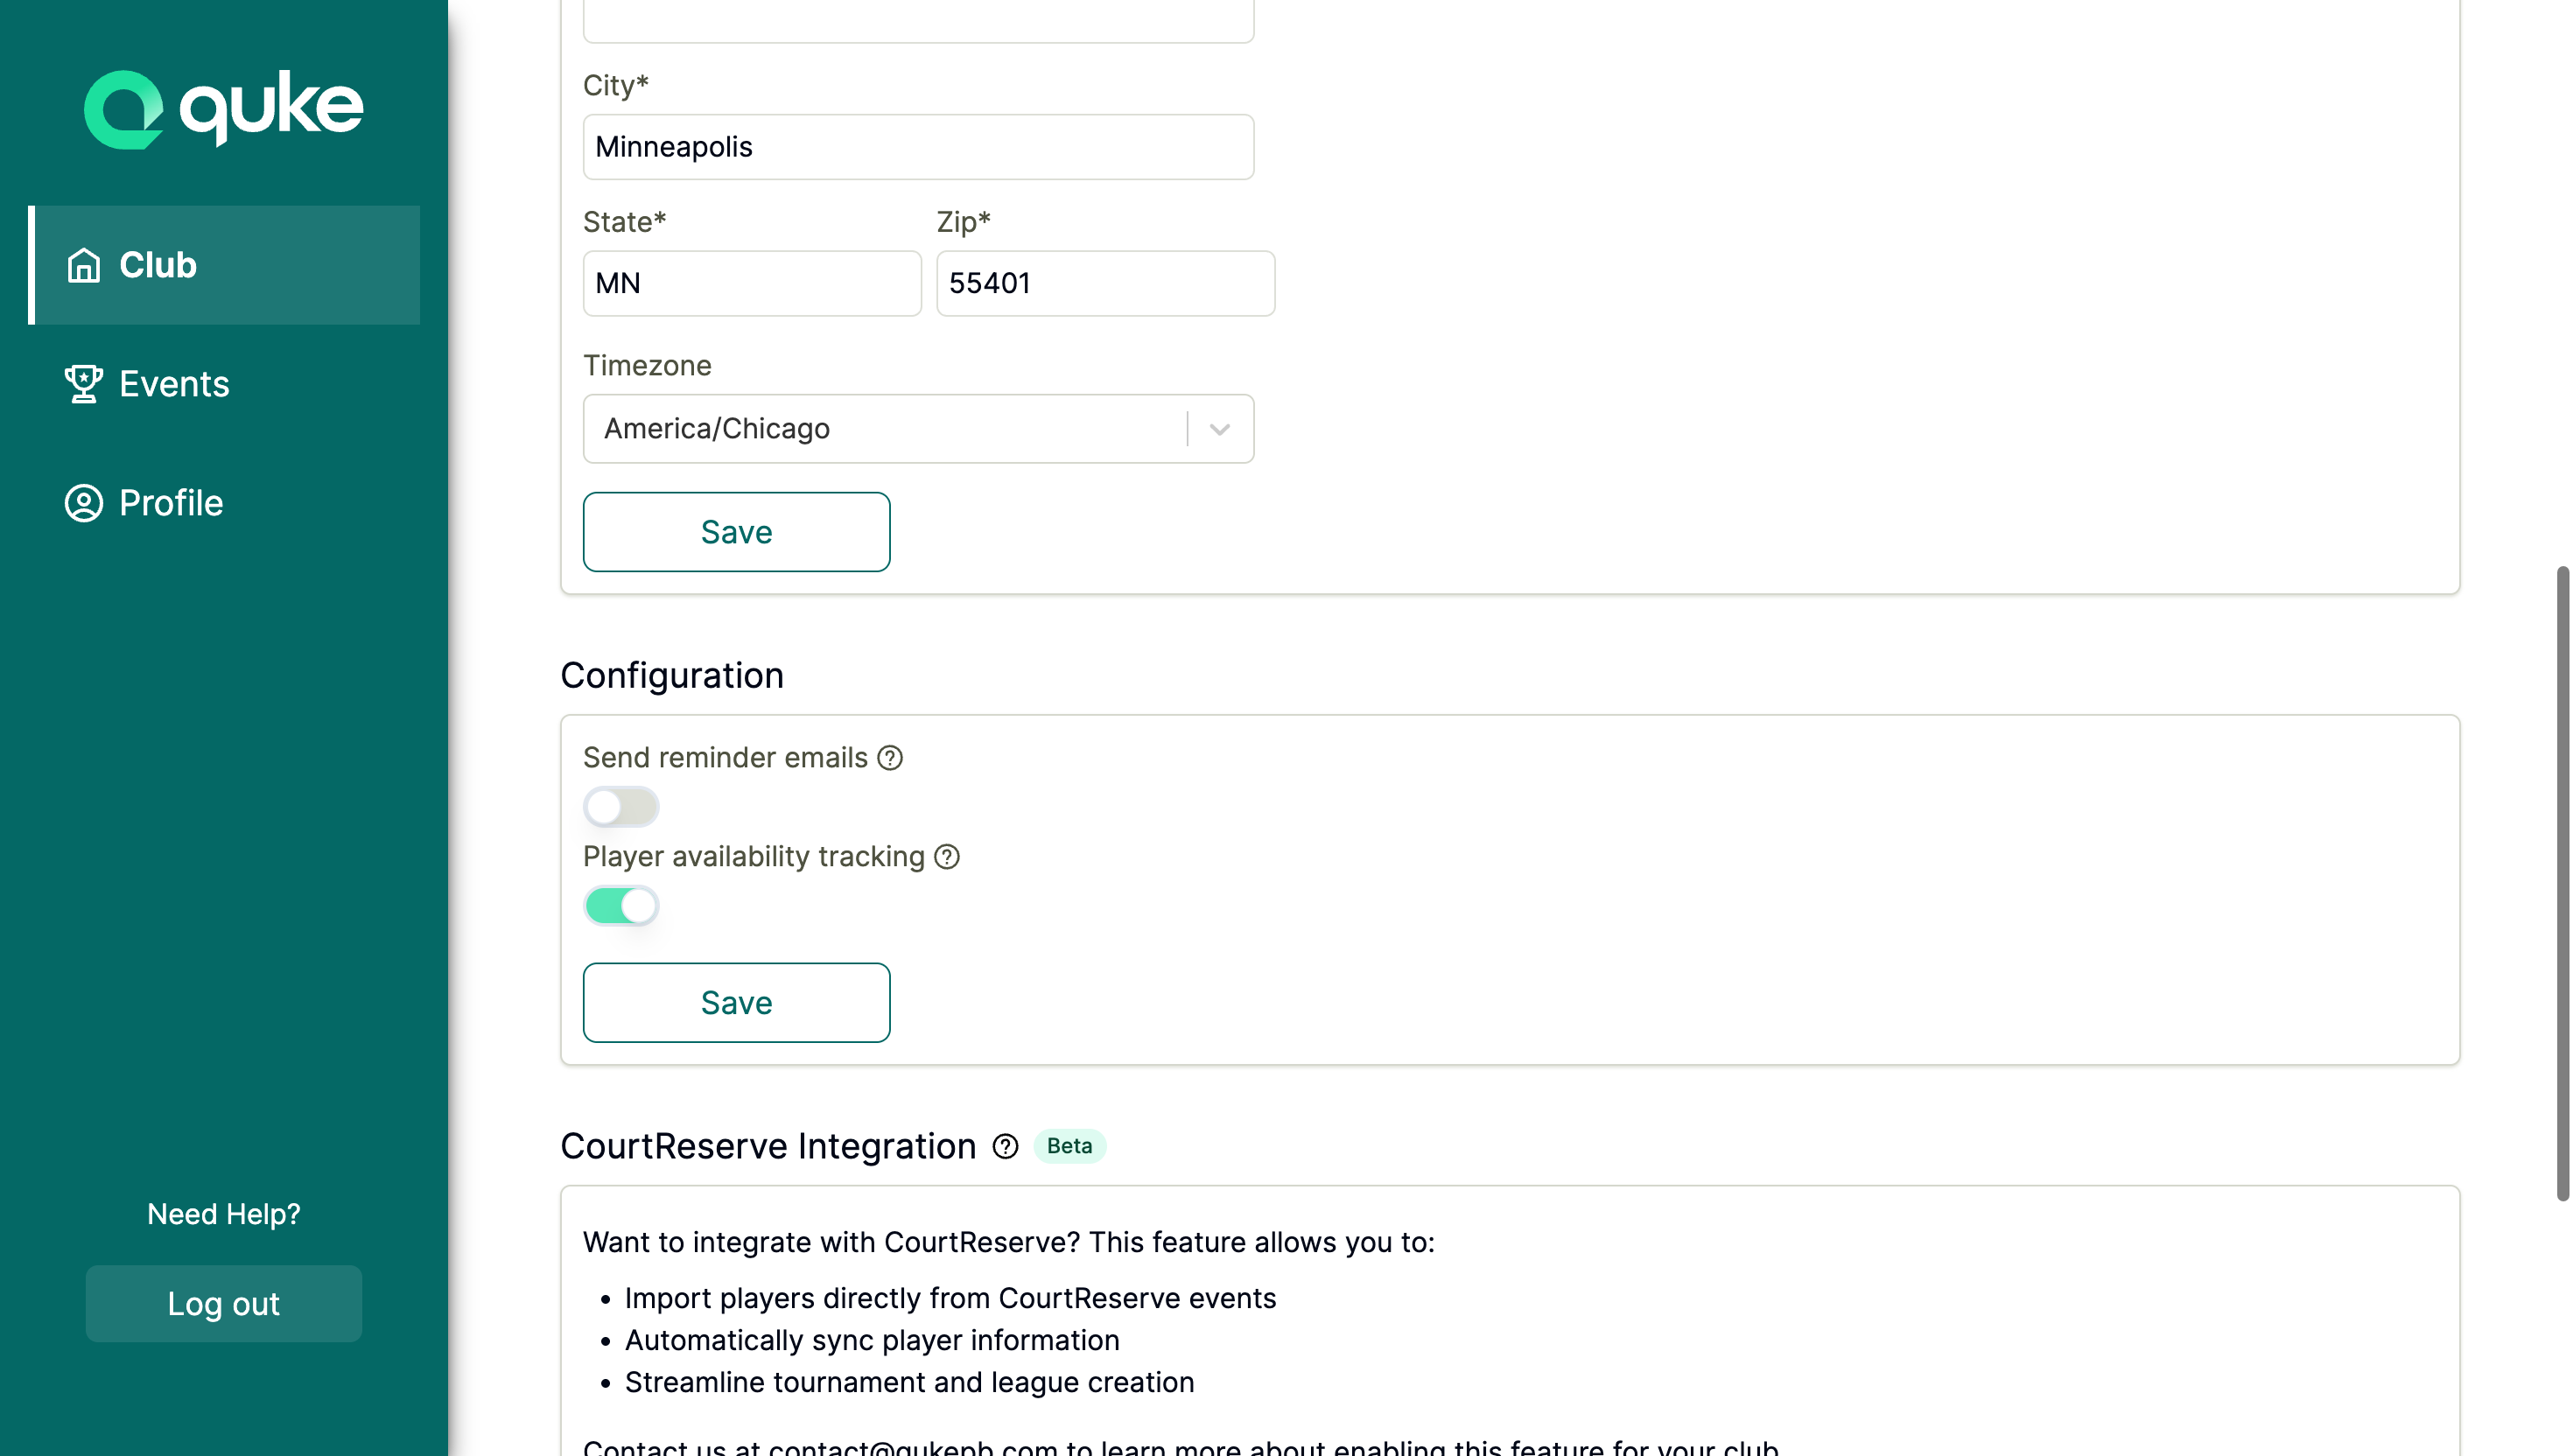
Once enabled, availability tracking becomes available for all tournaments in that organization.
For Organizers/Admins
Viewing Player Availability
- Navigate to a tournament’s admin page
- Click the Availability tab
You’ll see a table showing all players in the tournament with their current availability status:
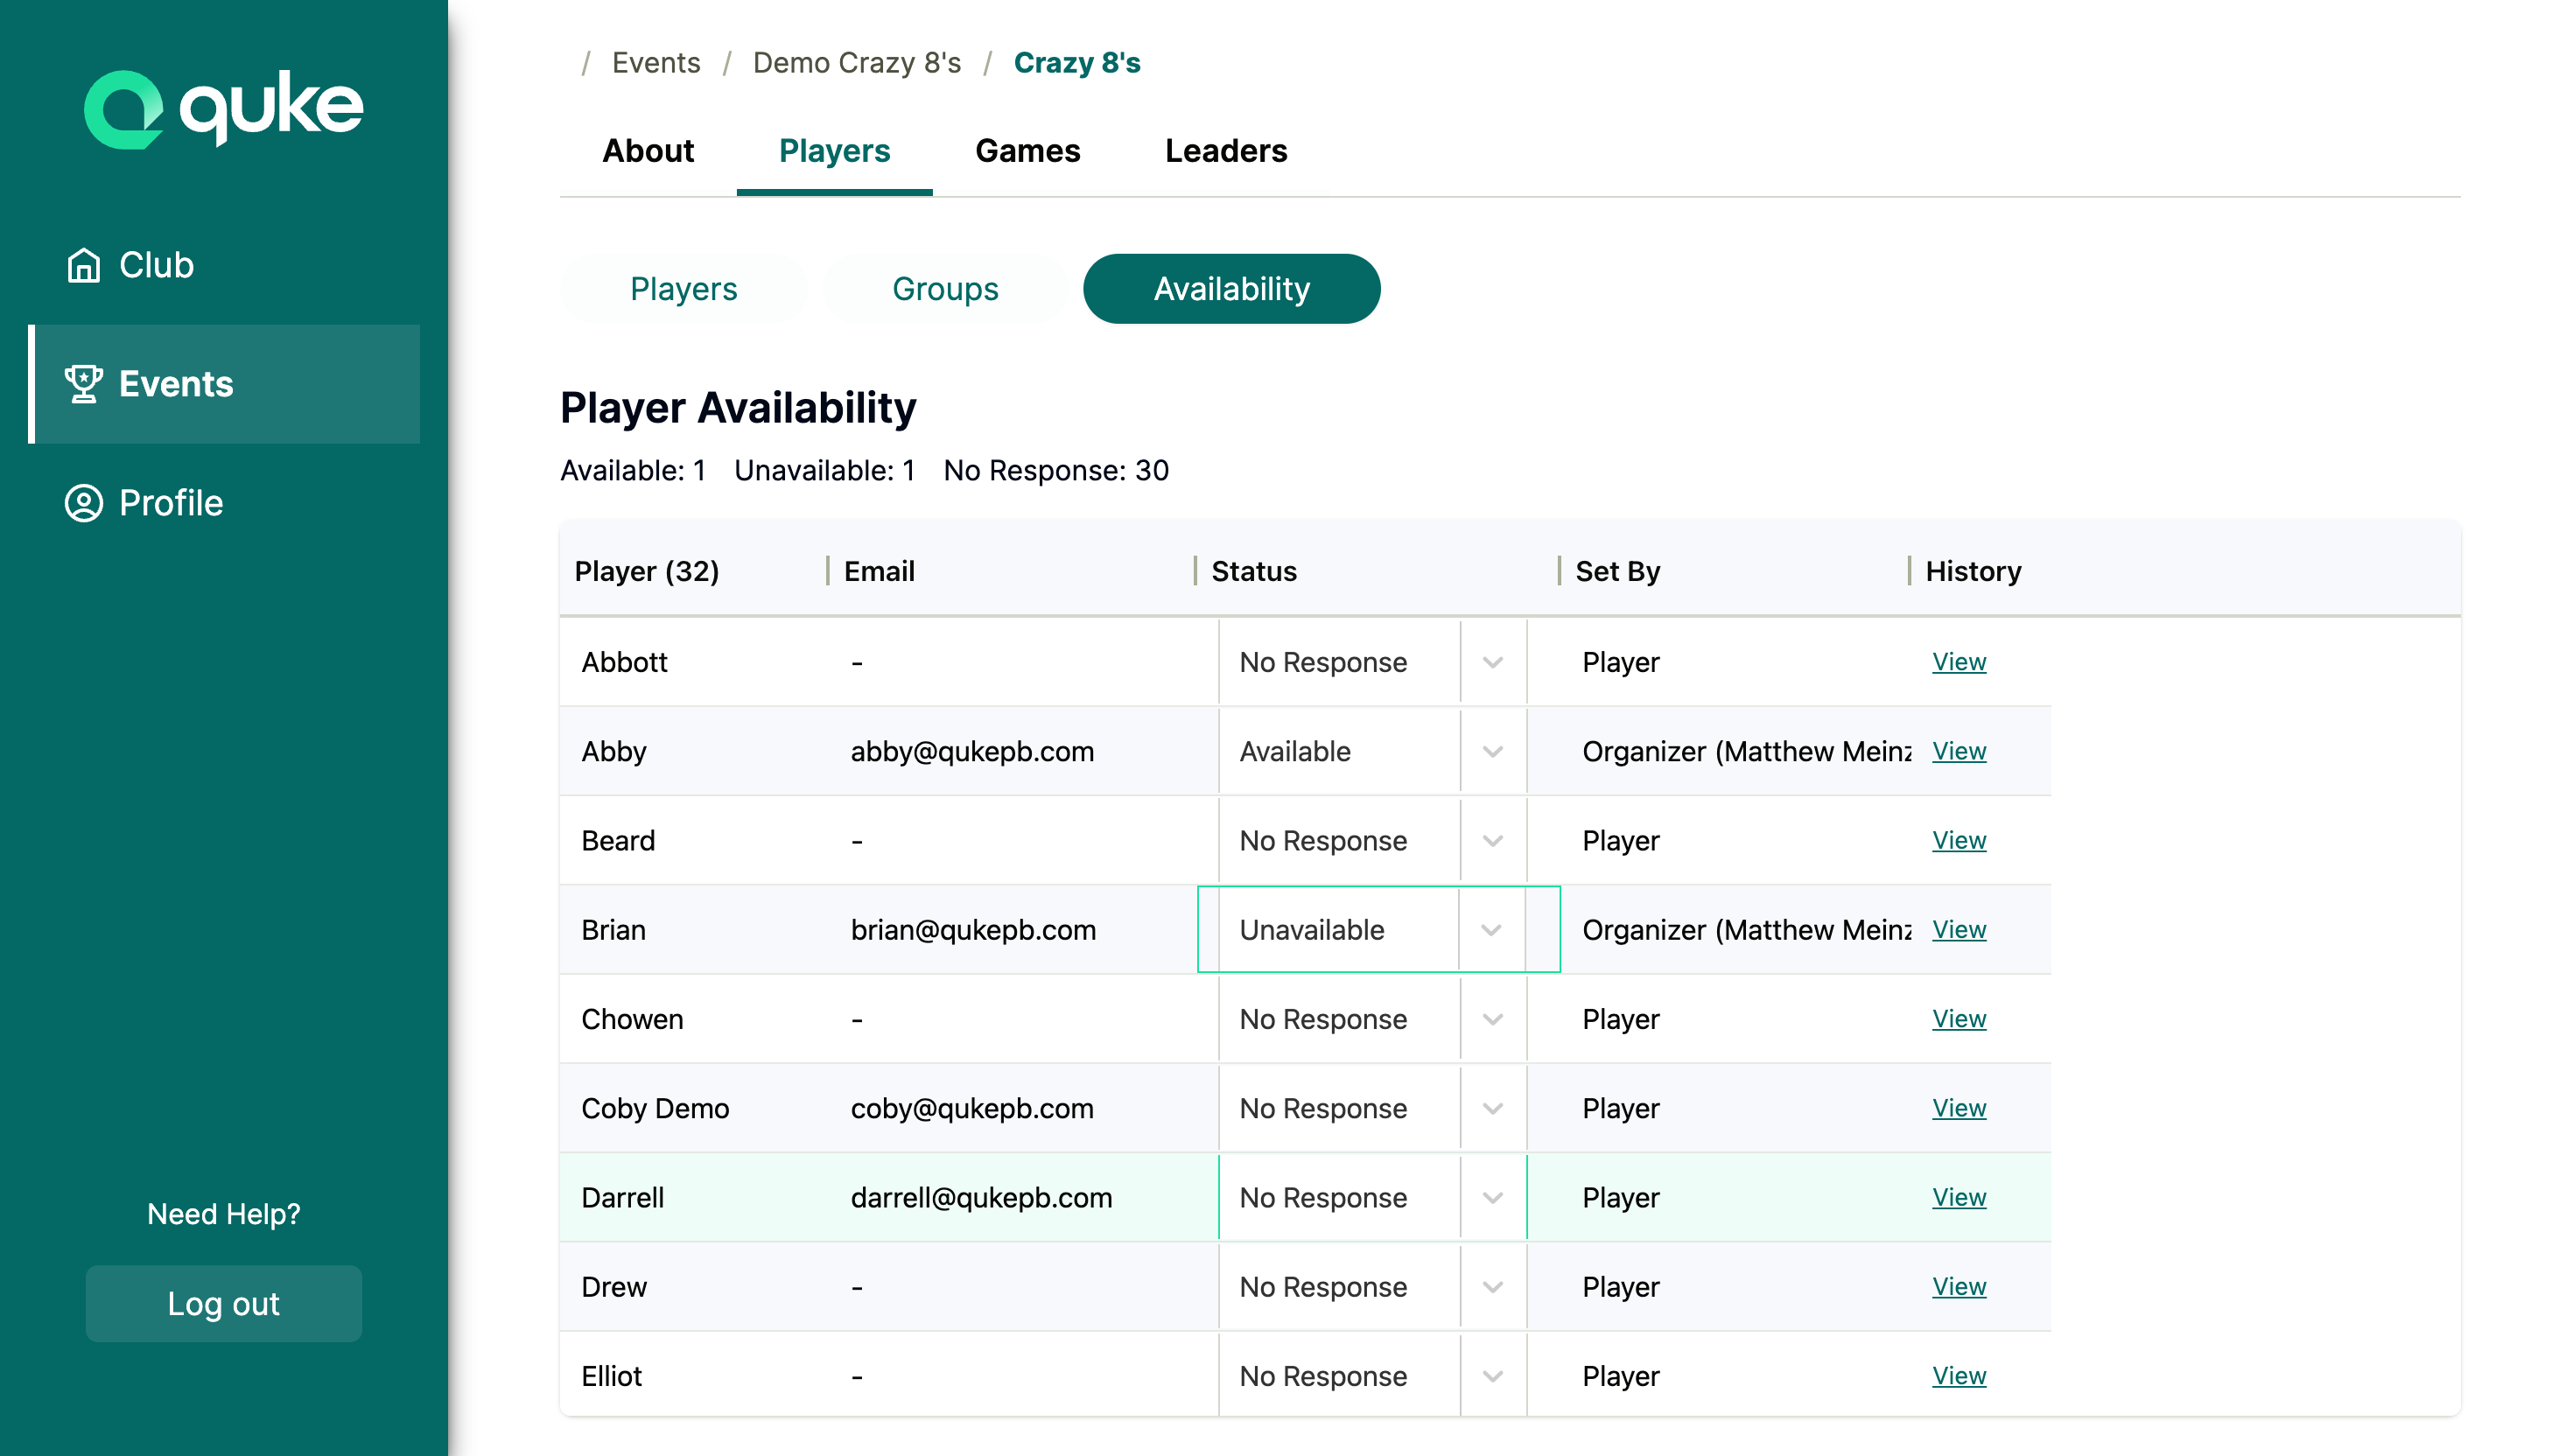
The interface displays:
- Summary counts at the top showing Available, Unavailable, and No Response totals
- A searchable table of all players with columns for Player, Email, Status, Set By, and History
Setting Availability for Players
- Find the player in the availability table
- Click the Status dropdown in their row
- Select the desired status:
- Available - Player intends to participate
- Unavailable - Player cannot participate
- No Response - Reset to default state
When you change a player’s status:
- The summary counts update immediately
- The “Set By” column shows “Organizer (Your Name)”
- A success toast confirms the change
Viewing Availability History
Every status change is recorded in an audit trail. To view it:
- Click the View History button in the top-right of the Availability tab
- A modal appears showing all status changes
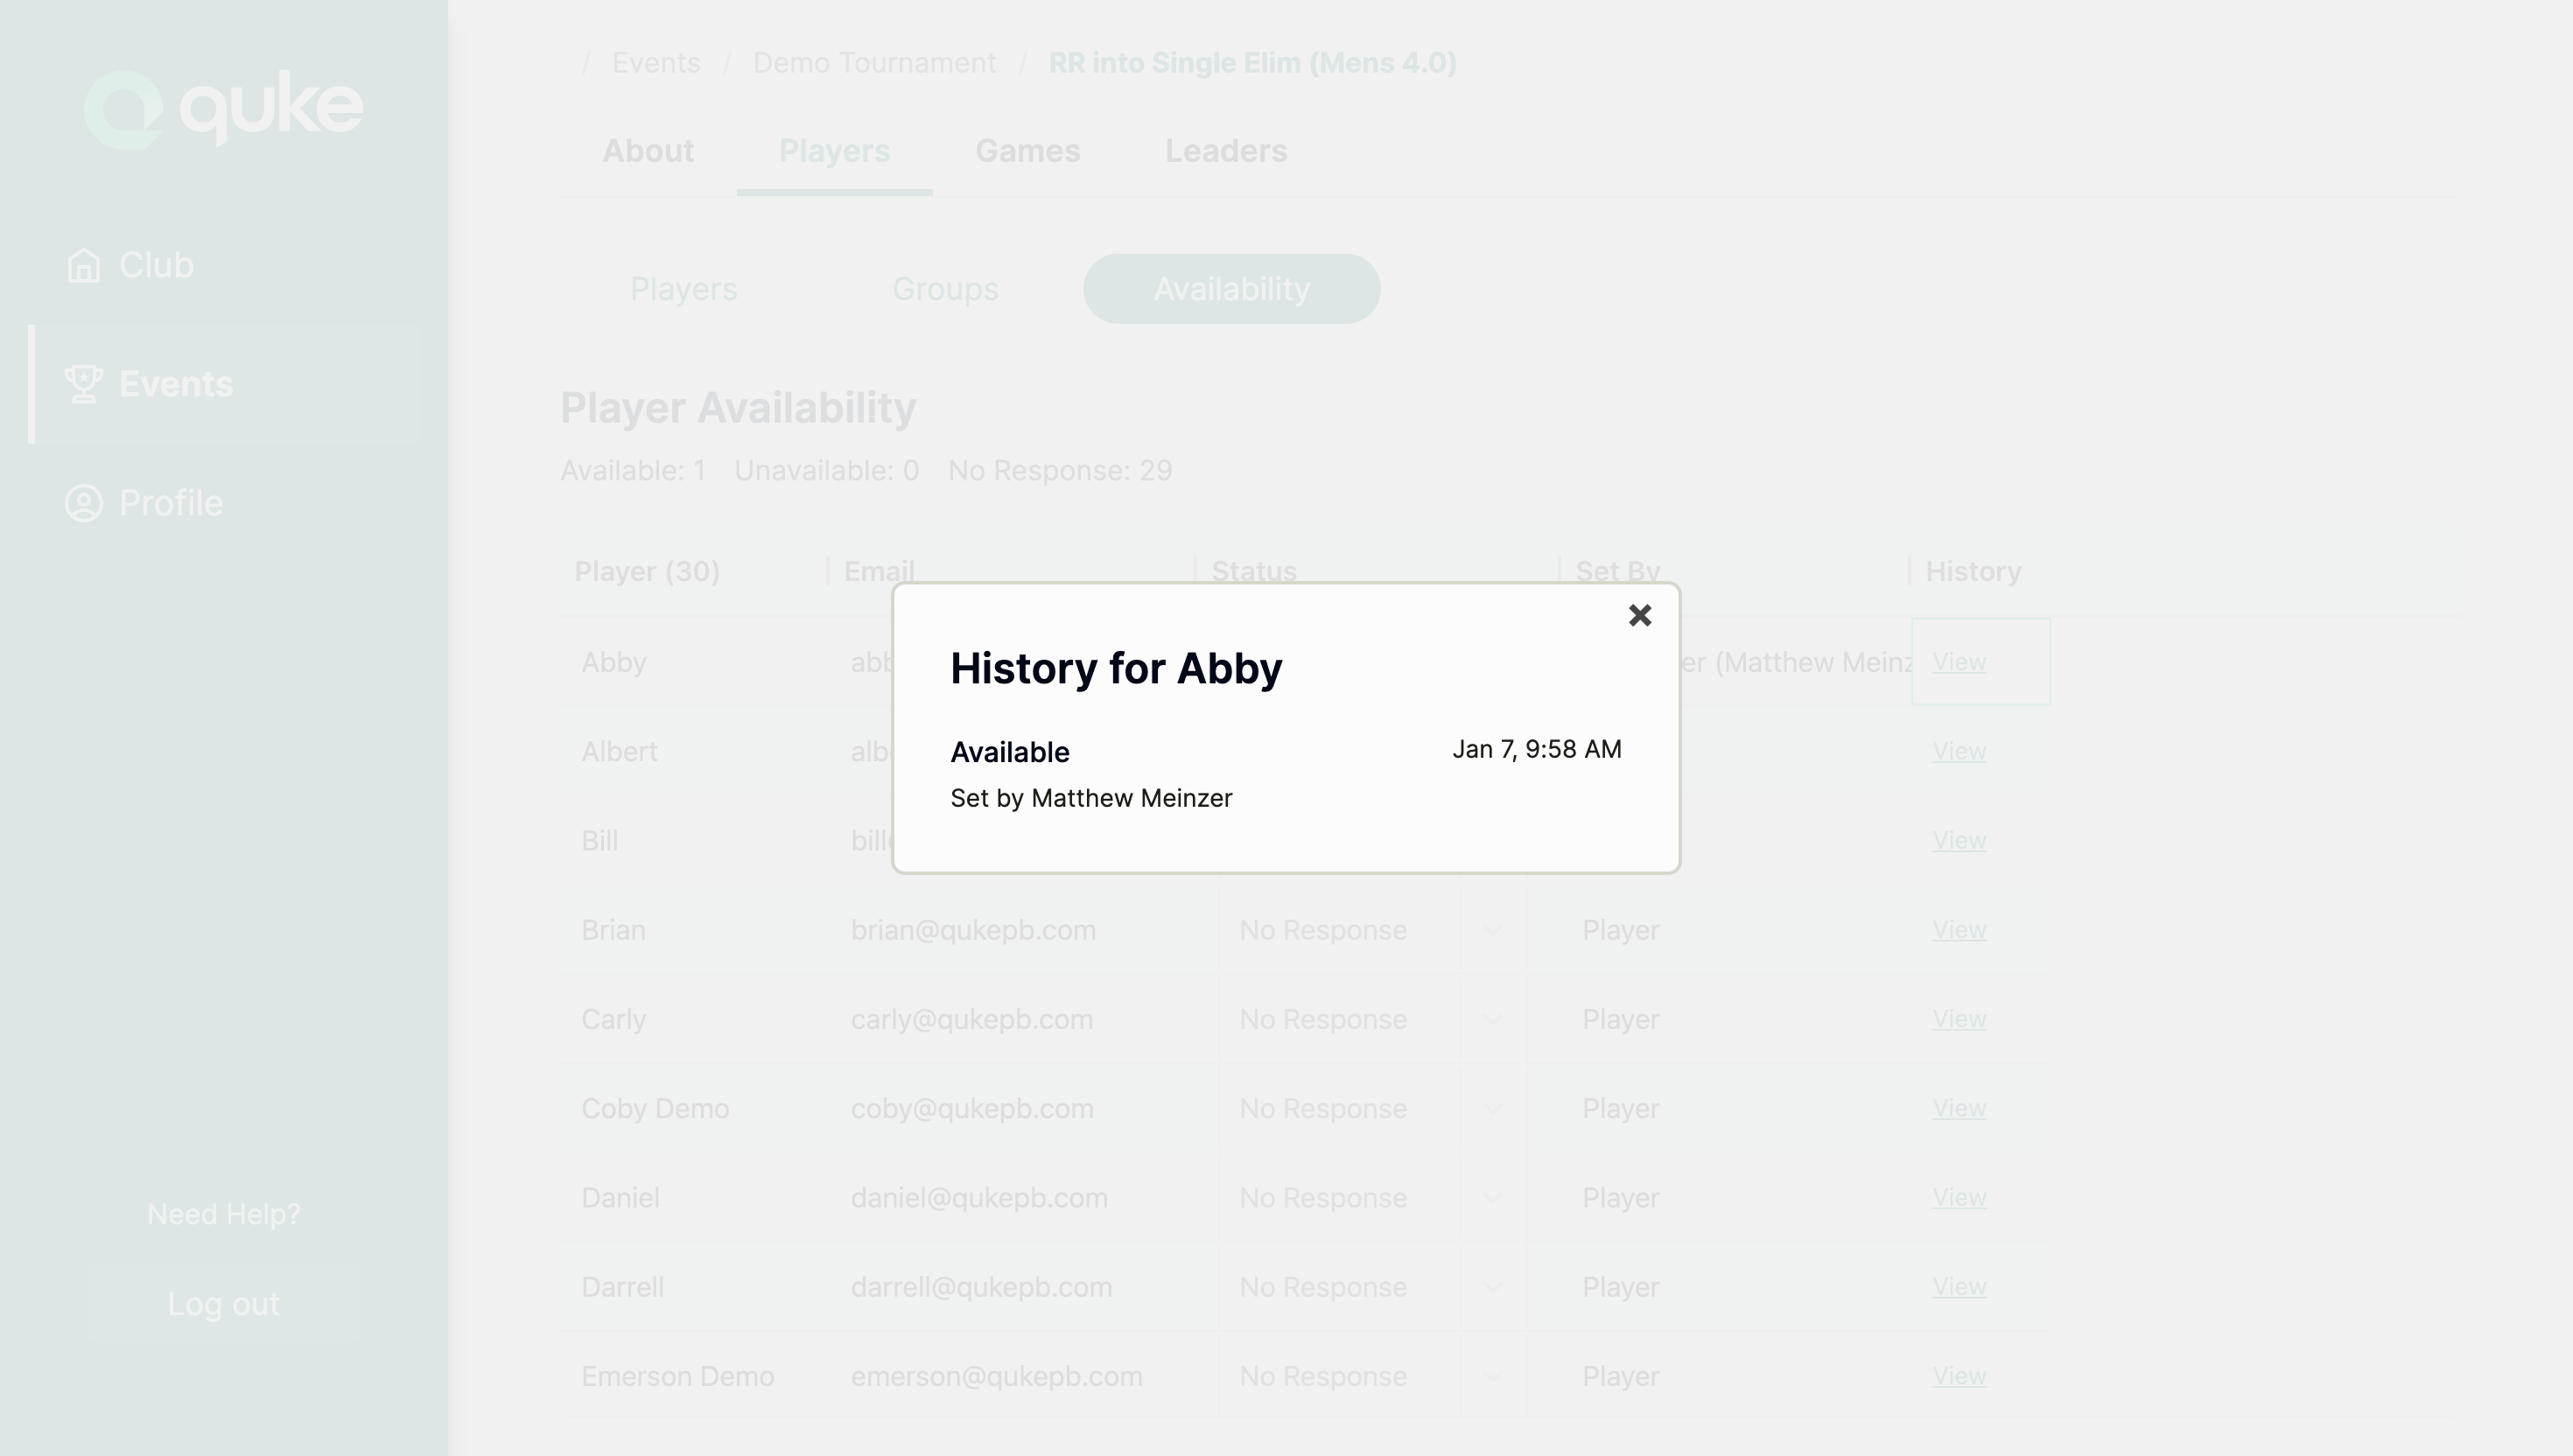
The history shows:
- Player name affected
- Previous status before the change
- New status after the change
- Who made the change (player or organizer name)
- Timestamp of when the change occurred
Availability Indicators in Player Table
The Players tab also shows availability indicators next to each player’s name:
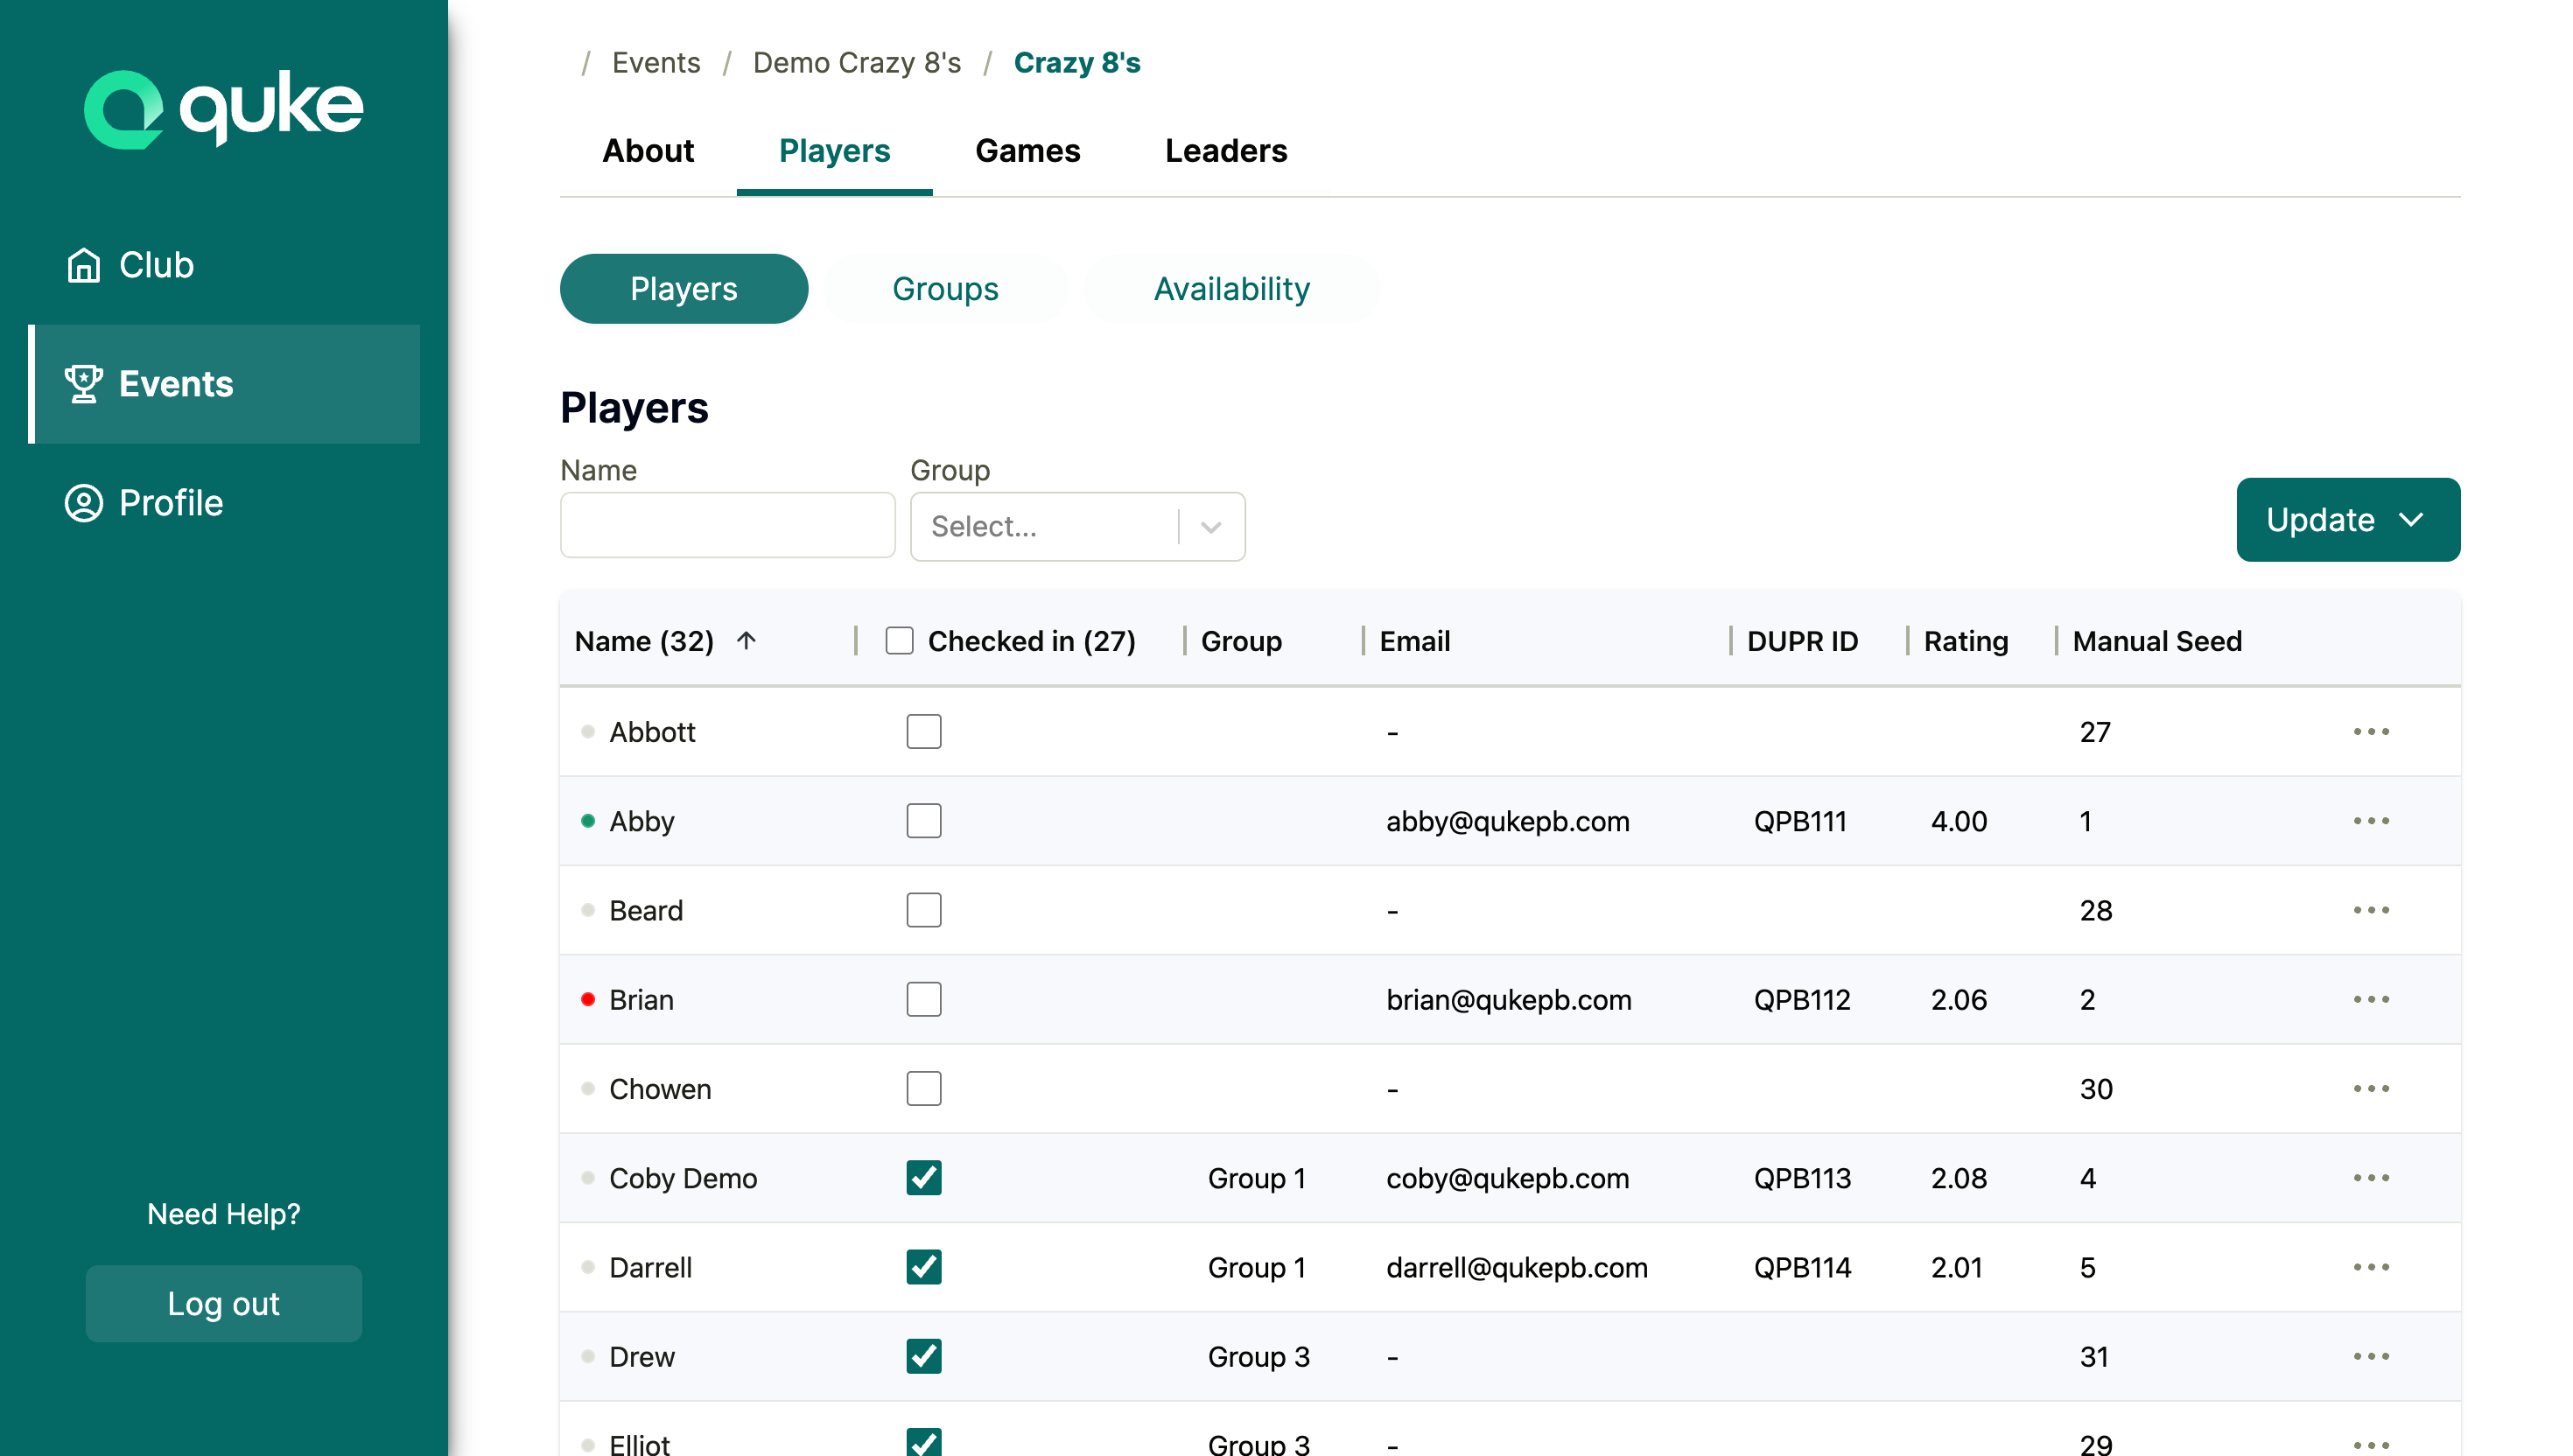
Small colored dots appear next to player names:
- Green dot - Available
- Red dot - Unavailable
- Gray dot - No Response
This provides a quick visual overview of availability without leaving the main player list.
For Players
Prerequisites
To set your own availability, you need:
- A user account linked to your player profile
- To be on a team in the tournament
Setting Your Own Availability
Players who are logged in and part of a team in the tournament can set their own availability:
- Log in to your account
- Navigate to My Events and select your tournament
- Click on the bracket you’re participating in
- Find the “Your Availability” section on the About page
- Click Available or Unavailable to set your status
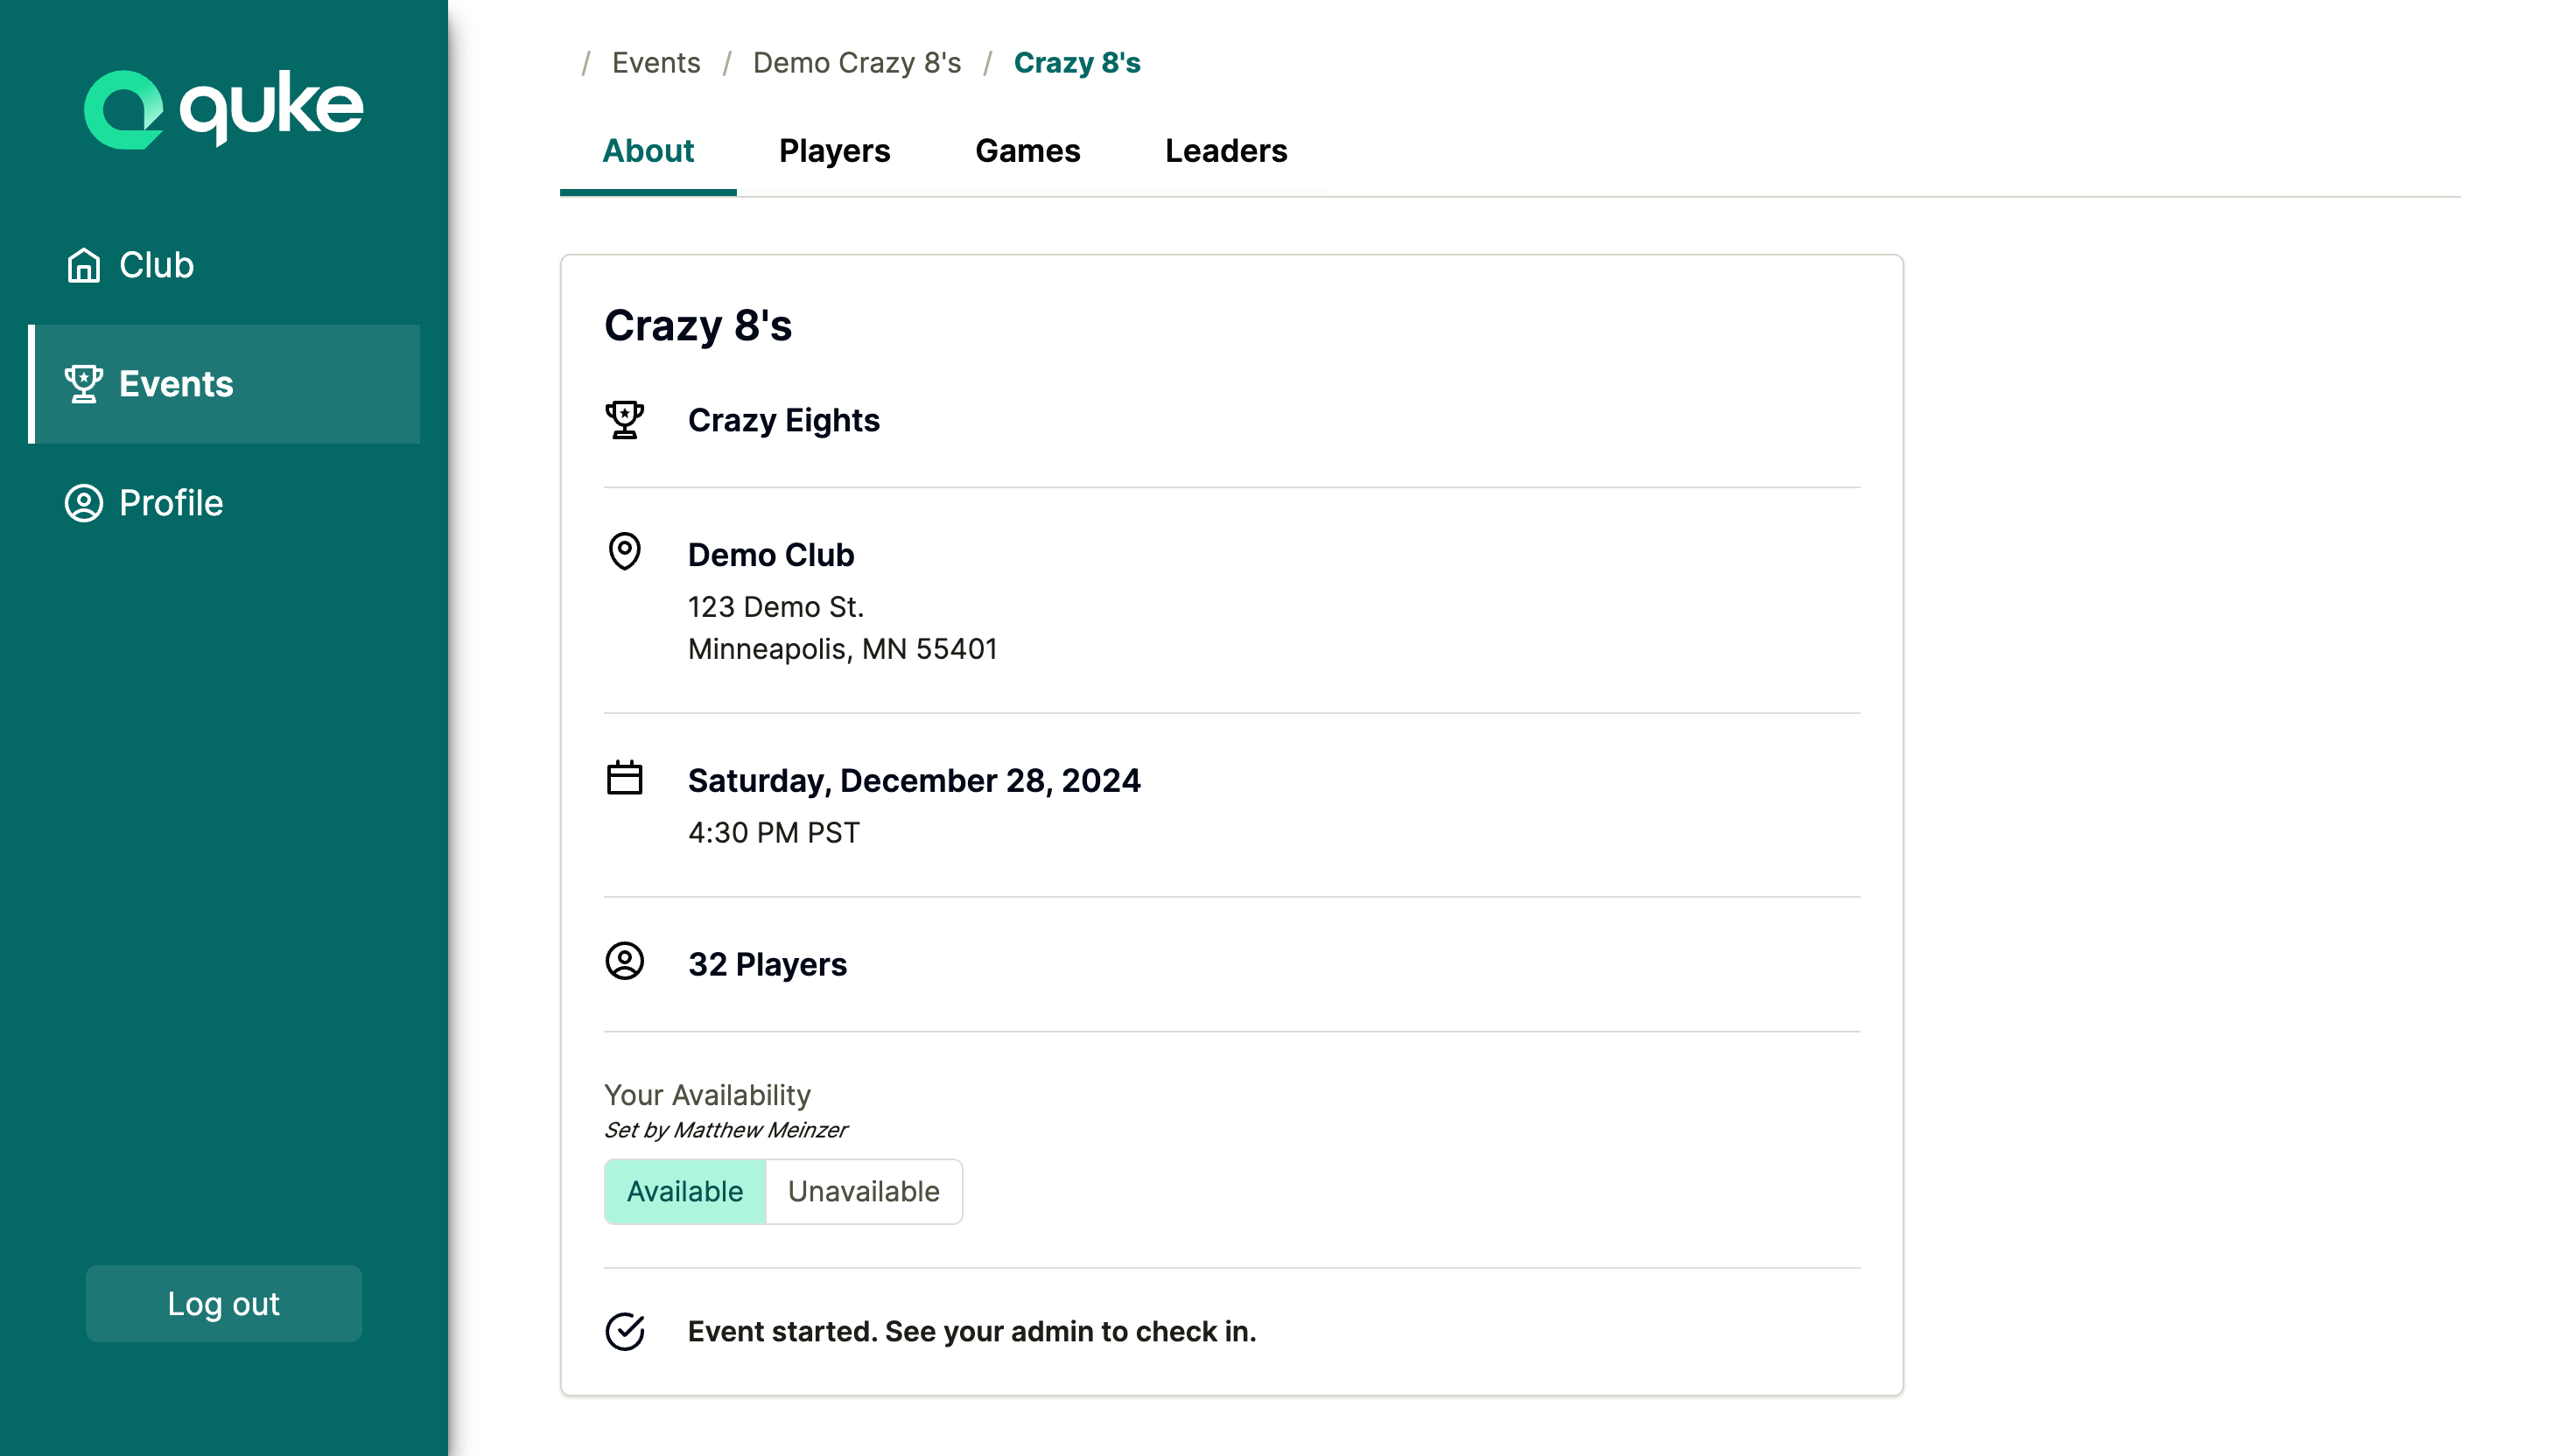
The interface shows:
- Your current availability status (highlighted button)
- Who last set your status (if set by an organizer, shows “Set by [Organizer Name]”)
After clicking a button, your status updates immediately:
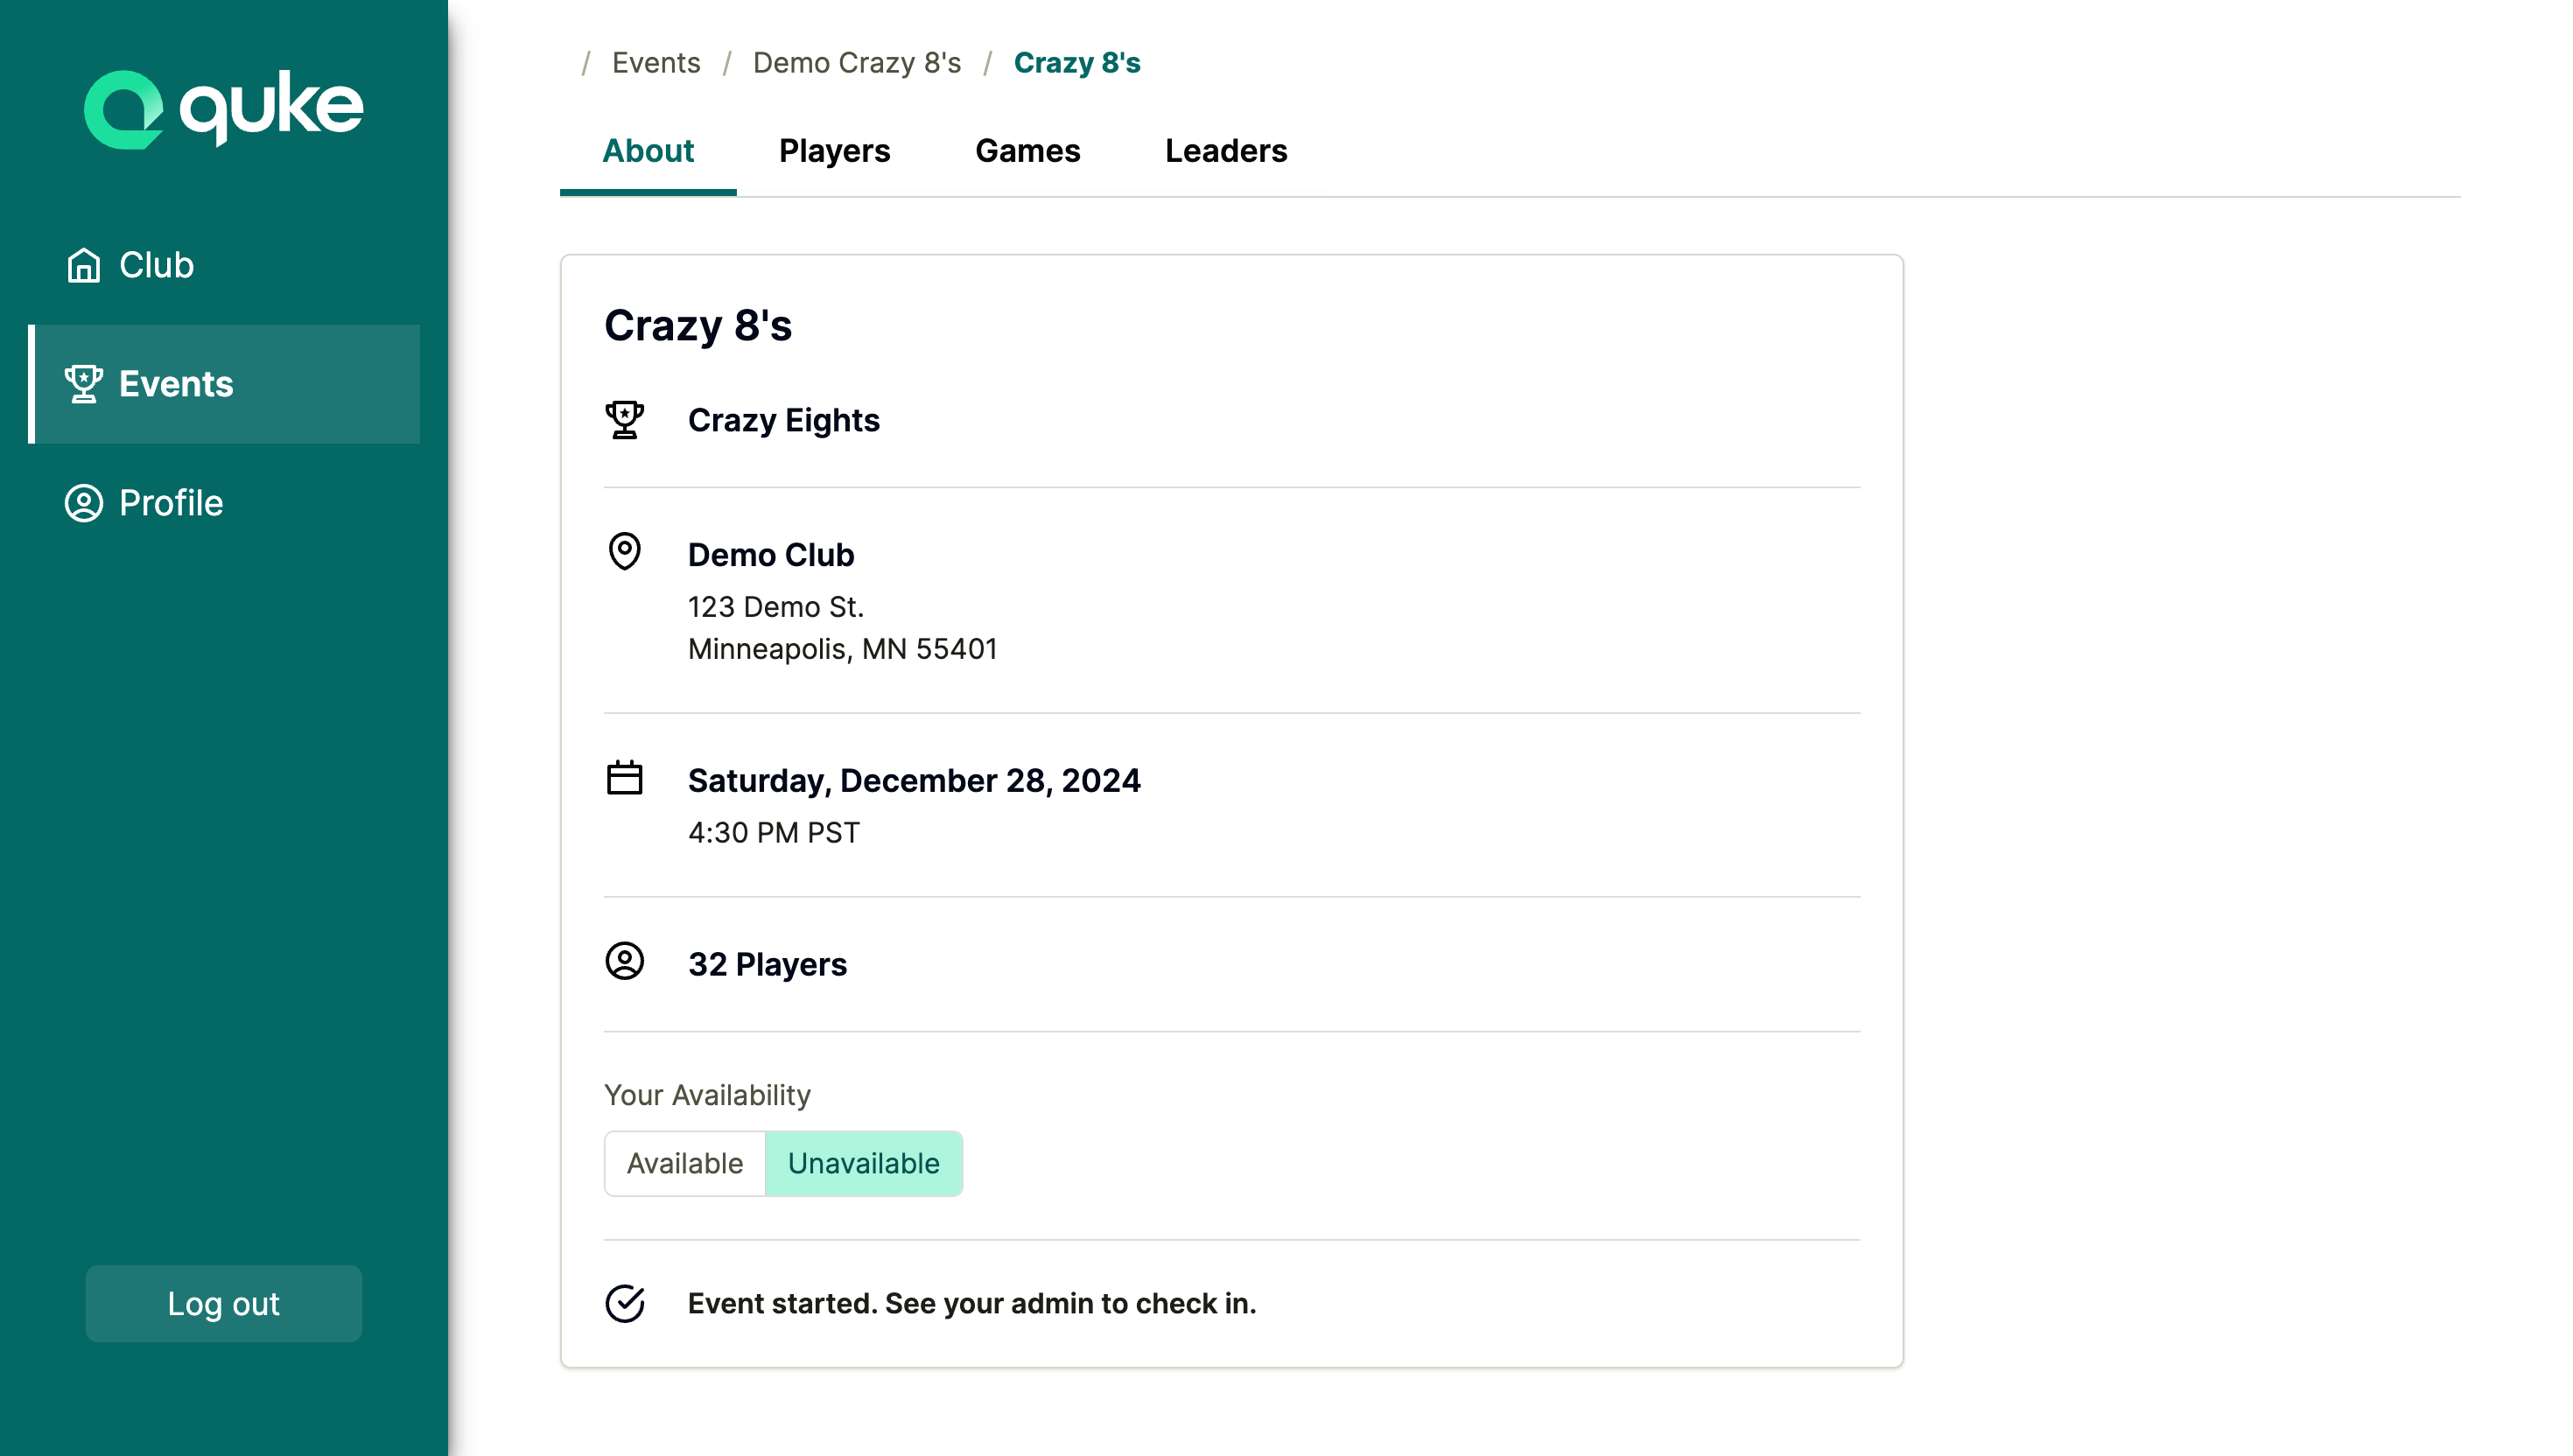
When you set your own status:
- The “Set by” note disappears (since you set it yourself)
- Organizers see “Set By: Player” in their admin view
- Only you and admins can see your availability indicator in the player table
- Your change is recorded in the audit history
Status Definitions
| Status | Meaning | Color |
|---|---|---|
| Available | Player intends to participate | Green |
| Unavailable | Player cannot participate | Red |
| No Response | Player hasn’t indicated availability | Gray |
Privacy & Visibility
- Admins see all players’ availability statuses
- Players only see their own availability indicator (not other players’)
- History is only visible to organization admins